This page may contain some links that are affiliate links - there is no extra cost to you, but I will receive a small portion of the profit if you purchase from these links. I only link items that I love or use myself. Thanks so much for your support of my business! :)
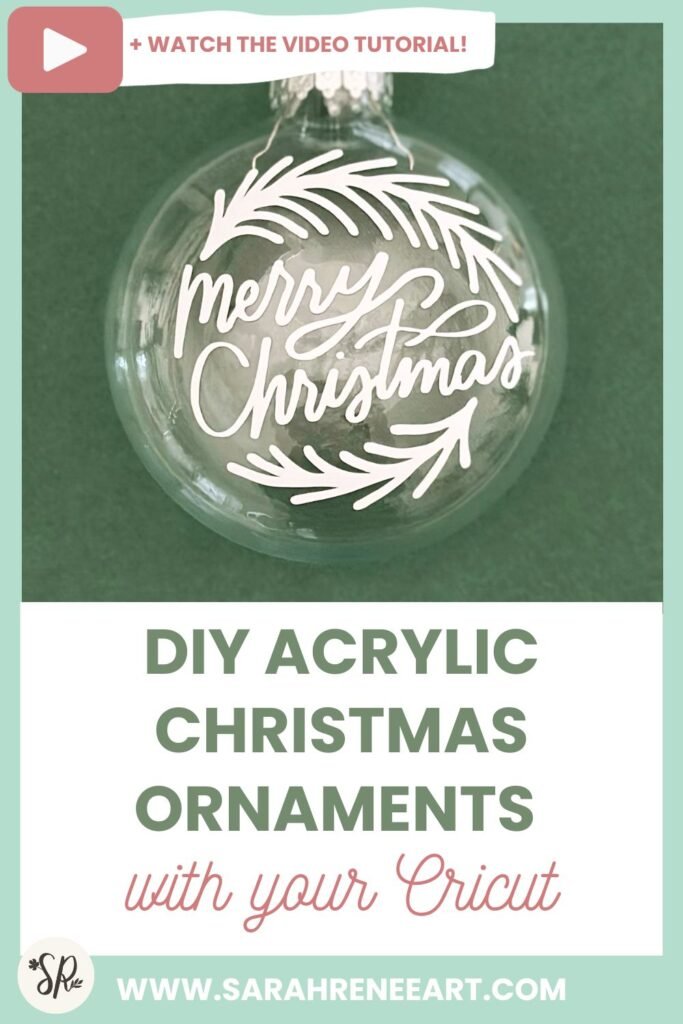
The holiday season is the perfect time to add a personal touch to your home decor with DIY Christmas ornaments. Using your Cricut machine, you can create custom ornaments that reflect your unique style and spread festive cheer. In this tutorial, I’ll walk you through the steps to make your own beautiful acrylic ornaments with vinyl letter and botanical elements, and I’ll give you tips and tricks to make the process smooth and enjoyable. I’ve included a video tutorial as well!
– these projects and SVGs are exclusive to Cricut Design Space –
Project Overview:
Several ornament designs are included in the project in Design Space. You can mix and match lettering elements with frame elements to design your personalized ornaments. Before we dive into the details, remember to measure your ornaments and resize the design if needed. In this tutorial, I’m working with 3″ acrylic ornaments.
Project Details:
– I’ve included several options for ornament decals in the project. Simply highlight and delete the designs you don’t wish to create. These designs look great in both single or two colors. You can follow the project as is for a single-color design, or detach the elements and change colors if you prefer a two-color look.
– To make the process even easier, I recommend using Premium Removable Vinyl, especially if you’re working with rounded surface ornaments. The flexibility of this type of vinyl makes repositioning any wrinkles so much easier.
Tips and Tricks:
Here are some handy tips and tricks to ensure a smooth crafting experience:
- Weed the vinyl while it’s still attached to the cutting mat. This can help keep the vinyl in place and prevent it from sliding around.
- When weeding, start with the small pieces before peeling away the larger outside portions.
- To align the vinyl decal with your ornament, use transfer tape with grid lines and make sure they match the bottom of the text for easy alignment.
- Before applying the vinyl decal, clean the ornament surface with alcohol (if it’s glass or porcelain) and wipe it with a lens cleaning cloth to remove any lint.
Materials You’ll Need:
- Premium Removable Vinyl
- Standard Grip Mat
- Acrylic Round Ornament (can be flat or rounded)
- Alcohol and Lens cleaning cloth to clean the ornament
Step-by-Step Instructions:
- Gather Materials: grab your cutting mat, Premium Removable Vinyl, transfer tape, and the acrylic ornament.
- Select Design: Choose the design that suits your style within the project and delete any other designs you don’t plan to use. Make sure to resize it to fit your ornament if necessary.
- Cutting Process: Place the vinyl on the cutting mat and follow the instructions in Design Space. Select “Vinyl” as the material and cut with your Cricut machine.
- Weed Vinyl: Carefully weed the vinyl by removing the excess material, leaving only your design intact.
- Apply Transfer Tape: Align the transfer tape over your design and burnish it to ensure proper adhesion.
- Apply Vinyl Decal: Carefully place the vinyl decal onto the cleaned surface of the ornament. Start by touching down the center of the design and then smooth out the sides gently, ensuring proper alignment.
- Final Touches: Use weeding tools to lift and smooth out any bumps or wrinkles on the decal.
- Remove Transfer Tape: Once the decal is securely in place, gently remove the transfer tape.
You can also follow along with the video version of this tutorial, which will be super helpful for seeing how to apply you decal and reposition any wrinkled pieces!
Thanks so much for following along with this tutorial with me! I’d love to see what you made, you can share your project & photo in Design Space, send me a photo or tag me on social media and it would make my day! You can also check out my other designs and projects on my Cricut Design Space profile – make sure to follow along so you’ll know when I create new projects. Happy crafting!
